Auto-Renew Let's Encrypt Free Certificates for Nginx on Linux
More than 75% of all websites use HTTPS nowadays. Serving content over HTTPS is not only good practice for search engine optimization (SEO), but essential for security reasons, especially for those requests containing sensitive information.
And with Certificate Authority (CA) like Let’s Encrypt issuing free certificates, it doesn't even cost you a dime. However, it is always a pain in the ass to deal with SSL/TLS certificates because they require manual actions when they expire.
So how about a hassle-free, one-time-only configuration?
This guide will help you set up a fully functional Nginx HTTPS server on a Linux machine (Debian/Ubuntu/RHEL/CentOS). Covering automatically renew Let's Encrypt certificates obtained by Certbot and basic settings to enhance security (e.g., HTTPS redirect, www redirect, disable direct access using IP address).
Prepare a Domain
First things first, we need a domain to obtain SSL/TLS certificates. Setting up an HTTPS server without a domain is possible, but Let's Encrypt doesn't issue certificates for bare IP addresses.
If you don't have your own domain yet, get a free second-level domain for testing with services like DNSExit or NO-IP.
After you get your domain, create DNS records for both example.com and www.example.com pointing to your public IP address.
Setting Up a Working Server
We need to set up a working Nginx HTTP server for the Certbot Nginx plugin to work. In this step, no configuration related to certificates will be included yet.
Install Nginx
Install Nginx if you haven't:
-
Debian/Ubuntu
$ sudo apt install nginx -
RHEL/CentOS
Install and enable EPEL (Extra Packages for Enterprise Linux) repository if you haven't:
$ sudo yum install epel-release
$ sudo yum update
Install Nginx:
$ sudo yum install nginx
To check if Nginx is installed correctly:
$ nginx -v
nginx version: nginx/1.20.2
Output
Start Nginx
Start the Nginx service:
$ sudo systemctl start nginx
Enable the Nginx service if you would like it to launch at system startup:
$ sudo systemctl enable nginx
Make sure Nginx started successfully:
$ systemctl status nginx
● nginx.service - A high performance web server and a reverse proxy server
	Loaded: loaded (/usr/lib/systemd/system/nginx.service; disabled; vendor preset: disabled)
	Active: active (running) since Tue 2021-12-28 14:27:53 CST; 16min ago
Output
If all things go well, you'll be able to see a welcome page on 127.0.0.1 or the public IP address of your remote machine:
Troubleshoot Firewall Problems
However, if the welcome page is unreachable, try to allow the incoming connections to port 80 and 443 with your firewall:
-
Using UFW (Commonly used by Debian/Ubuntu)
$ sudo ufw allow http $ sudo ufw allow https -
Using IPTables
$ sudo iptables -A INPUT -p tcp -m multiport --dports 80,443 -m conntrack --ctstate NEW,ESTABLISHED -j ACCEPT -
Using Firewalld (Commonly used by RHEL/CentOS)
Find out which zone is currently active:
$ firewall-cmd --get-active-zonespublic interfaces: enp0s31f6OutputAllow
httpandhttpsin the zone you got from the last command (in this case, it ispublic) then reload:$ sudo firewall-cmd --zone=public --permanent --add-service=http $ sudo firewall-cmd --zone=public --permanent --add-service=https $ sudo firewall-cmd --reload
Configure Nginx HTTP Server
Configure the HTTP server on port 80 by editing the server block of /etc/nginx/nginx.conf (replace example.com and www.example.com with your domain):
server {
	server_name example.com www.example.com; # include www and non-www of your domain

	listen 80;
	listen [::]:80; # IPv6
	...
}
Nginx config
Alternatively, you can add include /etc/nginx/conf.d/*.conf; to http block, then create server blocks for separate sites in /etc/nginx/conf.d (e.g., /etc/nginx/conf.d/example.com.conf).
Then validate your newly modified configuration file:
$ sudo nginx -t
nginx: the configuration file /etc/nginx/nginx.conf syntax is ok
nginx: configuration file /etc/nginx/nginx.conf test is successful
Output
Reload Nginx for the changes to work:
$ sudo systemctl reload nginx
Setting Up HTTPS
In this step we'll obtain certificates issued by Let's Encrypt, and walk through some basic Nginx configuration for an HTTPS server.
Install Certbot
Certbot is a Let's Encrypt client recommended by official guide and one of the most popular ways to obtain certificates issued by Let's Encrypt.
Install Certbot and Certbot plugin for Nginx:
-
Debian/Ubuntu
$ sudo apt install certbot python3-certbot-nginx -
RHEL/CentOS
$ sudo yum install certbot python3-certbot-nginx
Generate Certificates
Obtain certificates with Certbot and its Nginx plugin (replace example.com and www.example.com with your domain):
$ sudo certbot --nginx -d example.com -d www.example.com
Successfully received certificate.
Certificate is saved at: /etc/letsencrypt/live/example.com/fullchain.pem
Key is saved at:         /etc/letsencrypt/live/example.com/privkey.pem
This certificate expires on 2022-04-02.
These files will be updated when the certificate renews.

Deploying certificate
Successfully deployed certificate for example.com to /etc/nginx/nginx.conf
Successfully deployed certificate for www.example.com to /etc/nginx/nginx.conf
Congratulations! You have successfully enabled HTTPS on https://example.com and https://www.example.com
Output
Once the certificates are successfully generated, /etc/nginx/nginx.conf will also be updated by Certbot with some basic HTTPS settings including HTTPS redirect and presets from Certbot Nginx plugin (/etc/letsencrypt/options-ssl-nginx.conf):
server {
server_name example.com.com www.example.com.com;
listen 443 ssl; # managed by Certbot
listen [::]:443 ssl; # managed by Certbot
ssl_certificate /etc/letsencrypt/live/example.com.com/fullchain.pem; # managed by Certbot
ssl_certificate_key /etc/letsencrypt/live/example.com.com/privkey.pem; # managed by Certbot
include /etc/letsencrypt/options-ssl-nginx.conf; # managed by Certbot
ssl_dhparam /etc/letsencrypt/ssl-dhparams.pem; # managed by Certbot
...
}
server {
if ($host = www.example.com.com) {
return 301 https://$host$request_uri;
} # managed by Certbot
if ($host = example.com.com) {
return 301 https://$host$request_uri;
} # managed by Certbot
server_name example.com.com www.example.com.com;
listen 80;
listen [::]:80;
return 404; # managed by Certbot
}
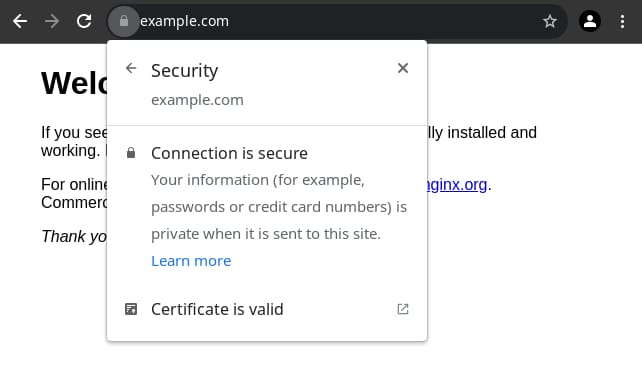
Nginx configNow the content of your site is served over HTTPS, you can check if the certificates are working by accessing your domain with HTTPS (e.g., https://example.com):
Additional Configuration (Optional)
The configuration generated by Certbot Nginx plugin is fine, but let's make it even better.
-
Enable HTTP/2
Add the
http2parameter to thelistendirectives of theserverblocks that listen on port443to increase security and performance:server { ... listen 443 ssl http2; listen [::]:443 ssl http2; ... }Nginx config -
www redirect
Presuming non-www is the preferred version of your domain (Alter the configuration if the other way around), we'll redirect www URLs to non-www.
Redirect all HTTP URLs to HTTPS and stripping www by changing the existing
serverblocks that listen on port80(replaceexample.comandwww.example.comwith your domain):server { server_name example.com www.example.com; listen 80; listen [::]:80; return 301 https://example.com$request_uri; }Nginx configDelete
www.example.comfrom theserver_namedirective of the existingserverblocks that listen on port443(replaceexample.comandwww.example.comwith your domain):server { server_name example.com.com; # delete www version of your domain listen 443 ssl http2; listen [::]:443 ssl http2; ... }Nginx configRedirect HTTPS URLs from www to non-www by creating a new
serverblock listen on port443(replacewww.example.comwith your domain):server { server_name www.example.com; listen 443 ssl http2; listen [::]:443 ssl http2; # following lines are copied from configuration generated by certbot ssl_certificate /etc/letsencrypt/live/example.com/fullchain.pem; ssl_certificate_key /etc/letsencrypt/live/example.com/privkey.pem; include /etc/letsencrypt/options-ssl-nginx.conf; ssl_dhparam /etc/letsencrypt/ssl-dhparams.pem; return 301 https://example.com$request_uri; }Nginx config -
Disable direct access using IP address
Create a new
serverblock listen on both port80and443with thedefault_serverparameter to catch undesired requests and end the connection without sending any data (444is a non-standard status code that instructs Nginx to close the connection):server { server_name _; listen 80 default_server; listen [::]:80 default_server; listen 443 ssl http2 default_server; listen [::]:443 ssl http2 default_server; ssl_reject_handshake on; return 444; }Nginx config
A full example includes tweaks above:
server {
  server_name example.com;

  listen 443 ssl http2;
  listen [::]:443 ssl http2;

  ssl_certificate /etc/letsencrypt/live/example.com.com/fullchain.pem; # managed by Certbot
  ssl_certificate_key /etc/letsencrypt/live/example.com.com/privkey.pem; # managed by Certbot
  include /etc/letsencrypt/options-ssl-nginx.conf; # managed by Certbot
  ssl_dhparam /etc/letsencrypt/ssl-dhparams.pem; # managed by Certbot

  ...
}

server {
  server_name example.com www.example.com;

  listen 80;
  listen [::]:80;

  return 301 https://example.com$request_uri; # redirect all HTTP request to HTTPS and stripping www
}

server {
  server_name www.example.com;

  listen 443 ssl http2;
  listen [::]:443 ssl http2;

  # following lines are copied from configuration generated by certbot
  ssl_certificate /etc/letsencrypt/live/example.com/fullchain.pem;
  ssl_certificate_key /etc/letsencrypt/live/example.com/privkey.pem;
  include /etc/letsencrypt/options-ssl-nginx.conf;
  ssl_dhparam /etc/letsencrypt/ssl-dhparams.pem;

  return 301 https://example.com$request_uri; # redirect www HTTPS request to non-www
}

server {
  server_name _;

	listen 80 default_server;
	listen [::]:80 default_server;
	listen 443 ssl http2 default_server;
	listen [::]:443 ssl http2 default_server;

	ssl_reject_handshake on; # reject ssl handshake since we're not going to serve any content here

  return 444; # drop connections using direct IP address
}
Nginx config
Don't forget to reload Nginx to apply the changes:
$ sudo systemctl reload nginx
Setting Up Auto-Renewal
By default, the SSL/TLS Certificates from Let's Encrypt last 90 days and need to be renewed after expiring. Manual renewal can be done by sudo certbot renew.
To make the process automatic, we would use cron to register a job to renew the certificates.
Enable & Start Cron Service
Check if cron is up and running:
-
Debian/Ubuntu
$ systemctl status cron● cron.service - Regular background program processing daemon Loaded: loaded (/lib/systemd/system/cron.service; enabled; vendor preset: enabled) Active: active (running) since Wed 2021-12-15 11:03:42 UTC; 2 weeks 5 days agoOutput -
RHEL/CentOS
$ systemctl status crond● crond.service - Regular background program processing daemon Loaded: loaded (/lib/systemd/system/crond.service; enabled; vendor preset: enabled) Active: active (running) since Wed 2021-12-15 11:03:42 UTC; 2 weeks 5 days agoOutput
Enable and start cron if is disabled or exited:
-
Debian/Ubuntu
$ sudo systemctl enable --now cron -
RHEL/CentOS
$ sudo systemctl enable --now crond
Adding Cron Job
Edit cron table (crontab) with your desired text editor:
$ crontab -e
Select an editor.  To change later, run 'select-editor'.
	1. /bin/nano        <---- easiest
	2. /usr/bin/vim.basic
	3. /usr/bin/vim.tiny
	4. /bin/ed
Output
Add the following line to cron table then save:
0 0 * * *	certbot renew --quiet
Plain text
Now Certbot will try to renew the certificates at 00:00 every day. If a certificate is about to expire within 30 days, it will be renewed. And since we have already installed the Certbot Nginx plugin, no further configuration is needed for the server part.
To verify the command works, you can use --dry-run to simulate the renewal process:
$ sudo certbot renew --dry-run
Processing /etc/letsencrypt/renewal/example.com.conf
- - - - - - - - - - - - - - - - - - - - - - - - - - - - - - - - - - - - - - - -
Account registered.
Simulating renewal of an existing certificate for example.com and www.example.com
- - - - - - - - - - - - - - - - - - - - - - - - - - - - - - - - - - - - - - - -
Congratulations, all simulated renewals succeeded:
  /etc/letsencrypt/live/example.com/fullchain.pem (success)
Output
Force Renewal
To force Certbot to renew certificates regardless of expiration date:
$ sudo certbot renew --force-renewal
Processing /etc/letsencrypt/renewal/example.com.conf
- - - - - - - - - - - - - - - - - - - - - - - - - - - - - - - - - - - - - - - -
Plugins selected: Authenticator nginx, Installer nginx
Renewing an existing certificate
- - - - - - - - - - - - - - - - - - - - - - - - - - - - - - - - - - - - - - - -
new certificate deployed with reload of nginx server; fullchain is
/etc/letsencrypt/live/example.com/fullchain.pem
- - - - - - - - - - - - - - - - - - - - - - - - - - - - - - - - - - - - - - - -
Congratulations, all renewals succeeded. The following certs have been renewed:
  /etc/letsencrypt/live/example.com/fullchain.pem (success)
Output
Be careful of the rate limits of Let's Encrypt when forcing renewal.